|
|
|
Adding a 4 Barrel Carb...
When
the power just isn't enough...then it's time to get rid of the
anemic 2 Barrel Carb. I first installed a Carter 500 cfm but
it was not enough, so I switched to a 625 cfm and that did the
trick.
DISCLAIMER:
use of this information is at your own risk. Mascot Graphics
takes no responsibility for interpretation of this information,
and it is to be used as a guide, not an instruction manual.
All modifications were done knowing the risk.
|
|
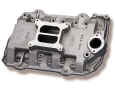
Weiand 7503 Stealth Manifold
I installed a new Weiand Intake
and Lokar Cables and decided to post some information about them
here. The installation 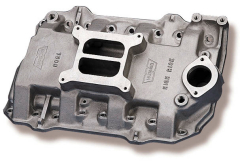 went extremely well and was very easy to
do. The hardest part of the intake install was finding all the right
fittings and parts, but the install was done in about three hours
altogether. The cables were very easy to do, I started at about 4:30 in the afternoon and had both the
throttle and transmission kickdown cables installed in just about two
hours. That's pretty good, considering the fact that I have never
seen these installed on a Mopar before. went extremely well and was very easy to
do. The hardest part of the intake install was finding all the right
fittings and parts, but the install was done in about three hours
altogether. The cables were very easy to do, I started at about 4:30 in the afternoon and had both the
throttle and transmission kickdown cables installed in just about two
hours. That's pretty good, considering the fact that I have never
seen these installed on a Mopar before.
I hope the information below helps you
out, the manifold and cables were acquired through Summit Racing and I have listed the
Summit part numbers below in case you are interested in ordering them for your
car. I have also listed the information for the various adapters and
fittings I needed, which I bought at NAPA. Please keep in mind that
these are for a 65 Poly 318, The earlier Poly motors may have used
different sensors than what I used. |
I
also used this opportunity to change belts, hoses and sensors. Here
is a list of the items I bought (some are a no brainer, but I'll still
list them so that perhaps you won't forget the "simple" ones):
| 1. Allen Head Bolt Kit |
6. Radiator Hoses |
11. Temperature Sender |
16. Manifold Gaskets |
| 2. Coolant |
7. Heater Hose |
12. Sender Adapter |
17. RTV Sealant |
| 3. Thermostat |
8. By-pass Hose |
13. Oil Press Sender |
18. Gasket Compound |
| 4. Bypass Hose Fitting |
9. Breather Hose |
14. Carb Plug |
19. Loctite (red) |
| 5. Heater Hose Fitting |
10. Vacuum Hose |
15. Manifold Plug |
20. Hose clamps |
|
|
The Parts...
| Weiand Intake |
WND-7503 |
Make sure you get Allen Head
bolts with washers, the stock bolts will not fit properly. |
| Bypass Fitting |
660-1475 |
The old fitting
from the 2
barrel manifold wouldn't fit, this was necessary. |
| Heater Fitting |
C-25487 |
The old fitting
from the 2
barrel manifold wouldn't fit, this was necessary. |
| Oil Sender |
OP6282 |
Good time to replace it, one
of the "why not" expenses. |
| Temp Sender |
TS6178 |
Good time to replace it, one
of the "why not" expenses. |
| Sender Adapter |
3220 X 4
X 2 |
This is needed for the
65...the hole is too large for the temp sender. |
| Throttle Cable |
LOK-TC-1000-HT36 |
Two
different lengths for the throttle cable are available, 24" &
36". (24 is long enough) |
| Kickdown Cable |
LOK-KD-2727HT |
This cable is specifically
for the 727 Trans, but a 904 is also available. |
| Cable Bracket |
LOK-SRK-4000 |
Not absolutely necessary, but
very much worth it and eases installation |
| Manifold Plug |
um.... |
There is a tapered, threaded
hole inside the water outlet, you'll need a plug for this. |
|
|
The Install...
 |
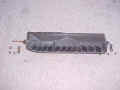
Here it is...the only
four barrel manifold I could find that was brand new, and this is
pretty much how it comes...no fittings, bolts or gaskets.
Summit does have the gaskets, I don't have the number off hand
though. |
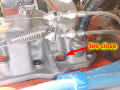 |
You can see here the
problem I had with the stock bolts. They all went in okay
except for this one, it was so close to the side that I couldn't get
a socket on it and the bolt couldn't be tightened. The Allen
head bolts are perfect for this and look great! |
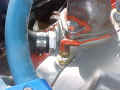 |
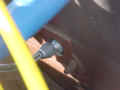
Here you can see the
adapter for the temperature sender. I used Teflon tape on all
fittings on the manifold |
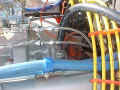 |
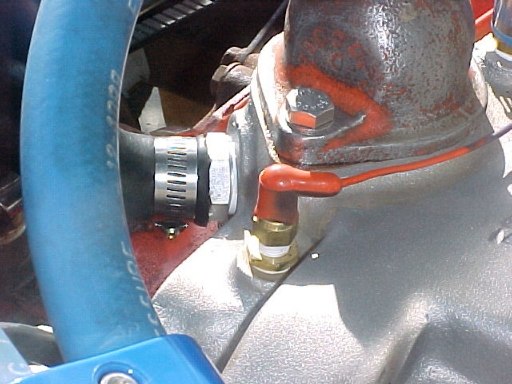
Here you can see the
Vacuum Hose for the Brake Booster. Non-Power Brake cars will
only have a vacuum hose for the inside controls, and it fits the new
manifold, although in an odd place. |
 |
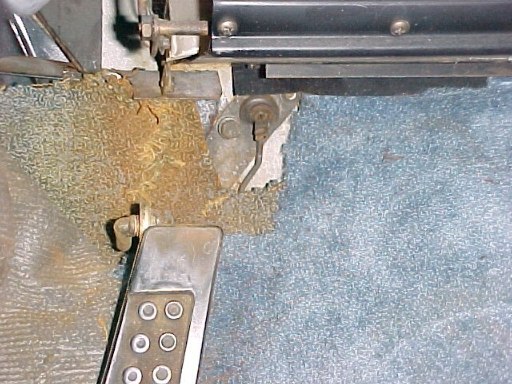
Here's a look at the gas
pedal and how the stock cable is connected. I chose to remove
the pedal as it was easier to swap cables that way. |
 |
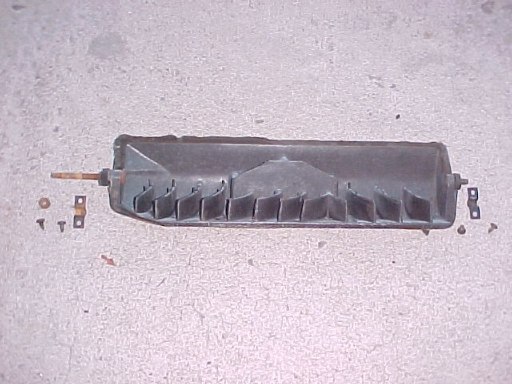
I removed the lower
floor vent so that I could get to the bolts on the gas pedal and
have some room to install it. |
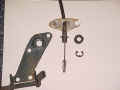 |
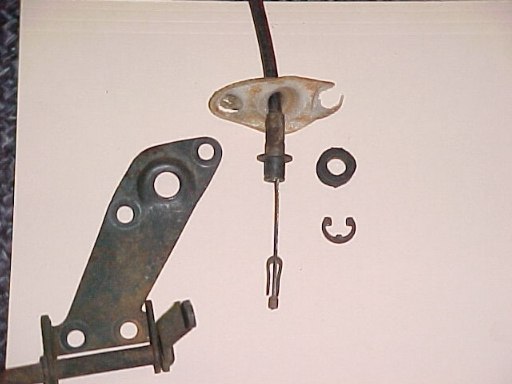
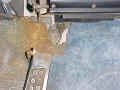
This is how the stock
cable looks when removed. There is a C-clip that holds it to
the bracket, and a cotter pin that attaches the cable. |
 |
I didn't take a picture
of the cable before putting it in, but you can see here that I
reversed the cone shaped nut to attach it. I used a
standard nut on the inside, it allowed the pedal to rest lower, the
cone nut is a bit long. |
 |
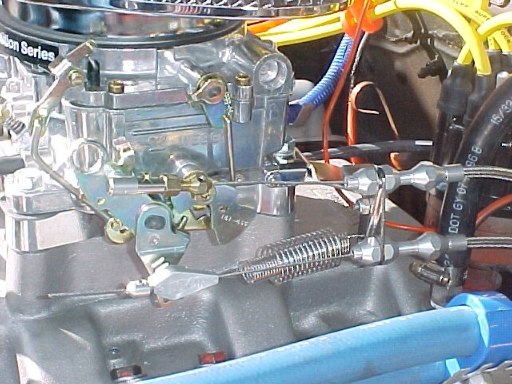
The Kick-Down Cable is pulled from the
bottom of the carb linkage. Make sure you don't get a
"Mopar" Carburetor...it doesn't have the lower
extension. There is a bracket that mounts to the back of the
trans and the cable loops around from behind. |
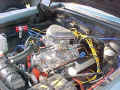 |
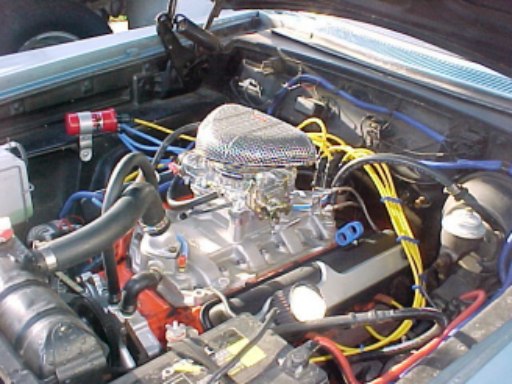
All in all...it makes for a pretty
decent looking motor (well, I did paint and detail a few items when
I was putting this together!) |
|
| This site
designed and maintained by Mascot Graphics © 2003 All Rights Reserved
|
|
|